Tuesday, November 26, 2013

Kaboodle Doodles Challenge 199

Hi everyone!!! Today I want to share a card I made for Kaboodles Doodles
"buttons and twine" challenge. The randomly drawn winner will receive 1 set of digi images from 
our sponsor  Melonheadz Illustrations.


Here is the card I made
This is a 6x6 card using Saturated Canary image. I colored the image with copics markers. For the background , I adhered sky blue twine on my base paper then layered some papers left over from other projects. Lasty, I added a paper doily that framed the image really well. 


Some close ups

Coloring with no lines technique.. This is the first time i tried this... it's hard but I really love the result.
I outlined the eyes and mouth with copic multiliner.


On the photo above, I adhered some heart buttons from my stash and  pearl mica flakes.


Be sure to check out KBCB to join and for more inspiration from other DTs.


Thanks for visiting and happy crafting!!


Tuesday, November 19, 2013

KABOODLE DOODLES CHALLENGE 198

Here is a tag I created for this week's challenge at Kaboodle Doodles using a super cute image for our sponsor  QKR Stampede.  The randomly drawn winner will receive 5 digital images from their store.

The image I used here is Pilgrim and is colored with copic markers.


Be sure to check out KBCB to join and for more inspiration from other DTs.


Thanks for visiting and happy crafting!!


PRETTY PAPER STUDIO NOVEMBER CHALLENGE

Hi everyone!!! Today I want to share two layouts I've created for this Pretty Paper Studio's "anything with glitter" November challenge. These two layouts are inspired by Tim Holtz Distress Glitter. Here are my finished layouts.

layout 1: OWL LOVE YOU FOREVER

                                        
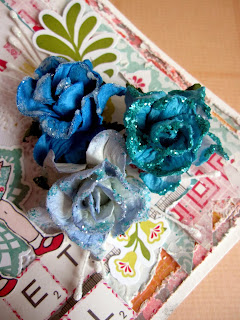
Here are some detailed shots of the layout.

The owl and the frame came from the Family Tradition Cameo Pack Accents. 


On this photo, I used Blue Fern Studios chipboard and sprinkled it with Distess Glitters.


Layout 2: OUR FAMILY TRADITION

On this layout, I used another beautiful chipboard from Blue Fern Studios and Mister Huey's mist. 


Here are some detailed shots of the layout.


materials list
Prima Flowers
Canson Watercolor Paper
Gesso
Golden Light Molding Paste
Acrylic Paint Teal and Black
Tim Holtz Mixed Media Stamp
Tattered Angels Candlelight 
Gauze
Pearl Trim
Marvy DecoColor White 
Prima Ingvild Bolme Distresser
Paper Doily
Stampendous Aged Rose Embossing Enamel
Prima Stencils


Don't forget to join us in this month's challenge.

A summary of what you have to do: 
Make a Scrapbook Page or a Card or an Altered Project with glitter in it. 
Your work has to be new: made after this challenge went live
Be a member of our Facebook Group and share your project in our album November Challenge: Anything with Glitter
Projects that are not shared in the specified album will be disqualified
Follow us on Blogger and Like us on Facebook
You can participate in this challenge only once
Deadline: November 30, 2013
Prize: A prize pack put together by PPS

Tuesday, November 12, 2013

Kaboodle Doodles Challenge 197

Happy Monday everyone!!! Today I want to share a tag I've created for
Kaboodle Doodles "Bountiful Harvest/ Blessings" challenge for this week.  The randomly drawn winner
will receive $10 voucher from thei store of our sponsor for this week
Di's Digis.

Here is the tag I created...

On the photo above is a tag I created by layering papers together and distressing them. 


Here are some detailed shots of the tag.

Here I applied molding paste then when it's dry I added orange acrylic paint on some areas.
I added distress crackle paint... waited for it to dry then sealed it with multi medium in matte and while it's still wet I sprinkled some glass beads.


Be sure to check out KBCB to join and for more inspiration from other DTs.


Thanks for visiting and happy crafting!!


Monday, November 11, 2013

Mixed Media Workshop at Lasting Impression

Hello everyone!!! Just want to share the mixed media layouts we created at
Lasting Impression last Saturday. 

First layout

On the layout above I use burlap tape for my background.
I overlap the tapes in different lengths then I painted gesso using a dry brush. I misted the background 
then brushed some glimmer glaze on random areas. I also used the glimmer glaze to 
create some splatters.


Second layout

On this layout I used two stencils with fiber paste as my medium. Misted it then added some splatters and some circles using lids of bottles.


Third layout

On this layout I use stencil for my background with fiber paste.
I also use a stamp to give the layout more texture. 

Here I use circle and banner punchers.

This is the hidden page under the first to photos.


Last layout

On this layout I also use stencils with gesso. The cameras are made from a stencil with light molding paste that I mixed with a little blue acrylic paint.


Thanks for visiting and happy crafting!!

Thursday, November 7, 2013

Pretty Paper Studio Product Spotlight

Hi everyone!! Ime here for PRETTY PAPER STUDIO Product Spotlight Tuesday.
Let me tell you guys more about Tim Holtz Distress Glitter..... 
It's in a 18 grams container with 24 beautiful colors to choose from. It looks like
vintage glass glitter but it's not glass. When you pour the glitter on a piece of paper, it's flat and not impressive but when you sprinkle it on top of an adhesive.... WOW!!!! The effect is just so pretty, almost like diamonds.

So what's the difference between distress stickles,
distress dry glitter and distress glitter???


The main difference is the coverage as you can see above and the particle size of the glitter also differs. Distress Stickles and Distress Dry Glitter have different sized particles while the Distress Glitter have uniform sized particles.


Let me share 2 projects using Distress Glitter.

My first project is a mixed media card using Eco Park "Sweet Girl" paper line.
                      
                       
On this image I added glossy accents to the flowers then sprinkled some distress glitter over them.


Here are some of the elements that I put together. All from Eco Park "Sweet Girl" collection.
I fussy cut the girl image and sentiments then added some stickers.

                       
            Here I created a background using Crafters Workshop Stencil "Climbing Vines" with white stone medium.
I misted it with Mister Huey's "First Kiss". While the medium is still wet I added some glossy accents
on random areas then sprinkled it with Distres Glitter "Peacock Feathers"


Here is my second project.


It's an envelop made using an envelope punch board by We R Memory Keepers (available at PPS)


On the photo above, I used multi medium gloss with my stencil then sprinkled a mixture of peacock feathers and rock candy ditress glitter.When it's dry I misted it with Mister Huey's First Kiss mist then added some sticker elements from Echo Park Sweet Girl collection. I also used a wooden frame, added glossy accents to the inner corners then sprinkled it with peacock distress glitter.


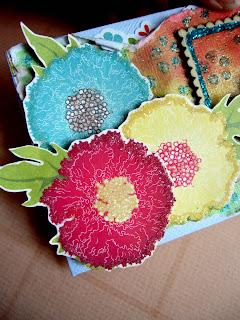
On this photo, I fussy cut some flowers for the Sweet Girl collection, outlined the edges with glossy accents then sprinkled rock candy distress glitter over them.  The effect is so beautiful. 

All products are available at Pretty Paper Studio.

Happy crafting everyone!!!

Tuesday, November 5, 2013

Kaboodle Doodles Challenge 196

Hi everyone!! We have a new challlege up at Kaboodle Doodles. Our theme for this week is
"Tribute to A Loved One".  The randomly drawn winner will receive 5 digis from our 
sponsor this week Eureka Stamps.


Here is the card I made for this week's challenge
This is a 6x6 card. I used a Greeting Farm stamp and Eureka Stamps Raining Hearts.
I added textured paste to the cloud then filled in the heart with distress stickles. When everything is dry I painted it Jo Sonja's Diamond Dust. 


Here are some detailed shots


Be sure to check out KBCB to join and for more inspiration from other DTs.


Thanks for visiting and happy crafting!!


Saturday, November 2, 2013

Gourdo's First Scrapbook Workshop Layouts

Happy Halloween everybody!!! 
I'm here to share the layouts and a card we did last October 26 at Gourdo's.
Thanks to the ladies who attended the workshop and also to Gourdo's for trusting me to teach their first scrapbook workshop.